
This is an old revision of the document!
Table of Contents
Install using the Minecraft Launcher
STEP 1: Download the Fabric Installer
Go to https://fabricmc.net/use/ and select the “Vanilla” option, then download the Windows exe installer or the Universal JAR installer.
Close the Minecraft Launcher.
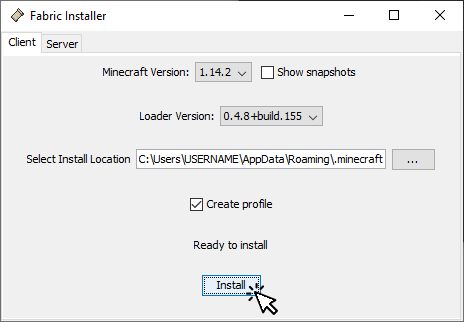
Run the Fabric Installer jar/exe you downloaded. Select the Client tab. Select the Minecraft Version and the Loader Version.
The Select Install Location should point to the Minecraft Launcher data folder.
Check Create Profile and click Install
Once the installer process is done, close the Fabric Installer.
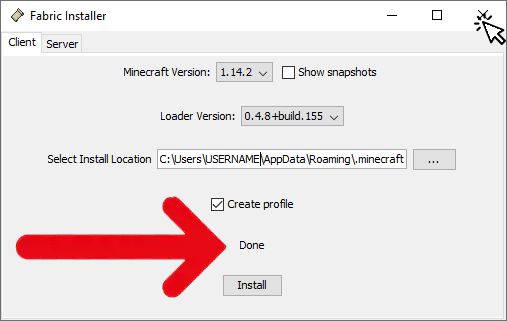
DO NOT RUN YOUR NEWLY CREATED FABRIC INSTALLATION YET!
STEP 2: Edit the "Game Directory" of the new Fabric Installation
Create a folder to use as “Game Directory” for the Fabric “Installation” you just created, for example:
C:\MC-FABRIC-1.14.2
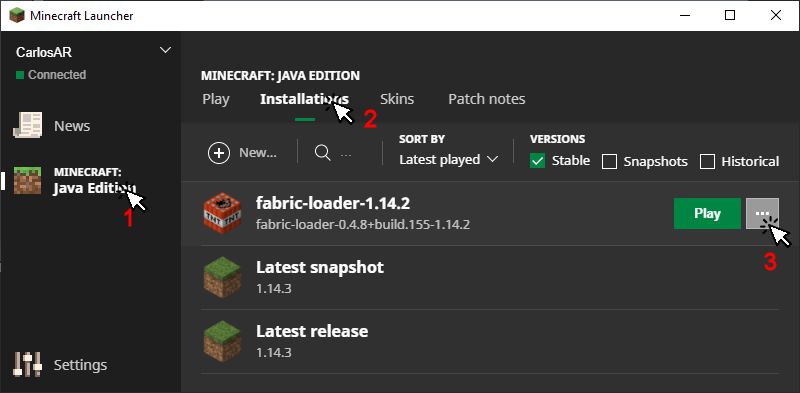
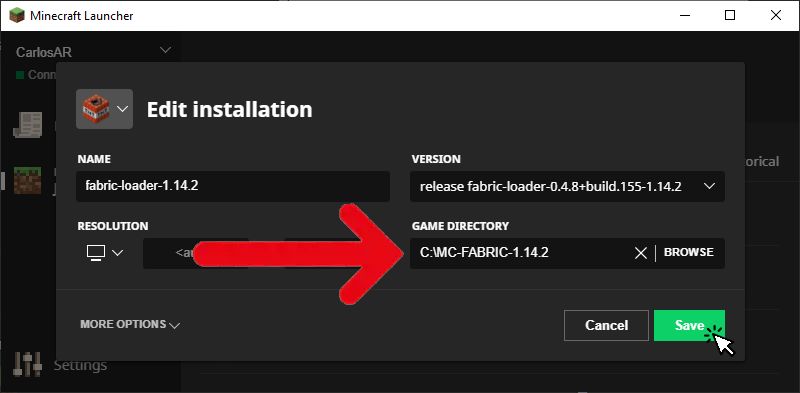
Open the Minecraft launcher, click on Minecraft Java Edition, click on Installations, click on the … button of the Fabric Installation:
Click on Edit
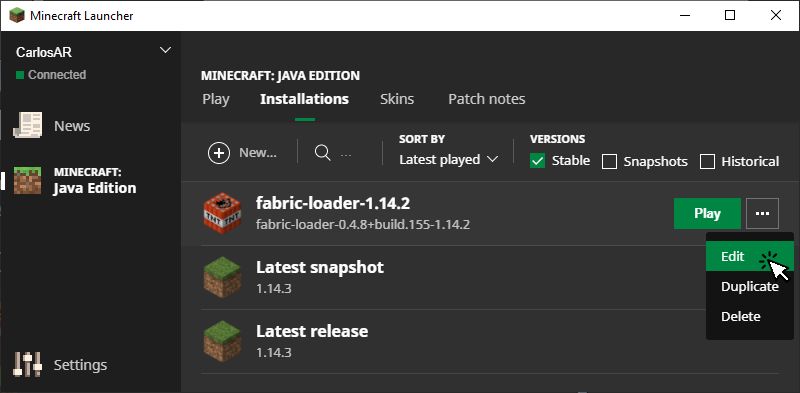
Change the GAME DIRECTORY to point to the folder you created, different from <Use default directory>
Do not use a preexisting folder inside the default .minecraft folder the launcher uses.
Click Save
You can now launch the Fabric Installation.
NOTES
If you don't change the GAME DIRECTORY the Fabric Installation will share its saved worlds with all the other Installations that have the game directory set to default. It will also share the mods and config folder with other modded Installations you may have that have the game directory set to default, making things an absolute mess.
You may set the GAME DIRECTORY to any folder you want, but it may be a good idea to use a folder inside your user profile for example:
userprofile\minecraft-installations\fabric-1.14.2 for a MC 1.14.2 Fabric Installation
Where userprofile is the path of the actual location of your userprofile, usually C:\Users\yourusername
Where yourusername is your actual user name, not the text yourusername, for example James or Anna or MadMax.
STEP 3: Install the Fabric API
The “Installation” you just created contains the Fabric Mod Loader, you now have to install the Fabric API before being able to use most Fabric mods.
The Fabric API is the core library for the most common hooks and intercompatibility measures utilized by mods using the Fabric toolchain.
If that sounds too complicated just consider the Fabric API as just another mod that will be loaded by the Fabric Loader, and almost all Fabric mods depend on it, so this will be the first mod to install.
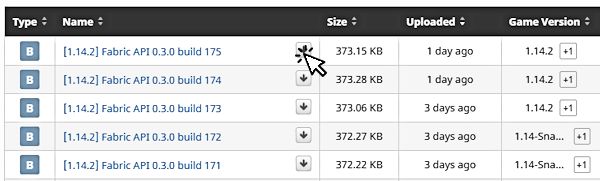
Go to https://www.curseforge.com/minecraft/mc-mods/fabric-api/files/all and download the latest file for the version of Minecraft you used in the MultiMC instance you just created.
Be aware that Curse usually is not up to date to the latest Minecraft versions, so the version indicated in the “Game Version” column may not be the real actual version of the file! Check the file name for the real Minecraft version the file is intended for.
For example if your instance is for Minecraft 1.14.2, the correct Fabric Api file would be “[1.14.2] Fabric API 0.3.0 build 175” (there may be a newer version of the 1.14.2 Fabric Api after this tutorial was written).
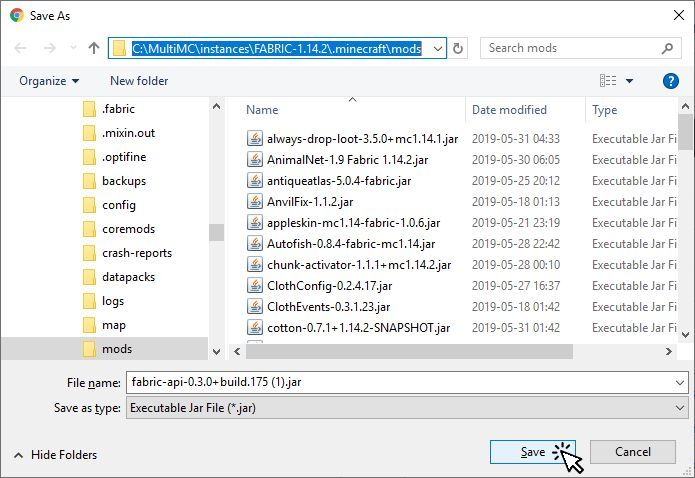
Download the file to the mods folder of the Game Directory of the Installation you created. Remember that you changed the Installation Game Directory in STEP 2
Run the Minecraft instance to make sure everything is working as expected.
STEP 4: Install Fabric Mods
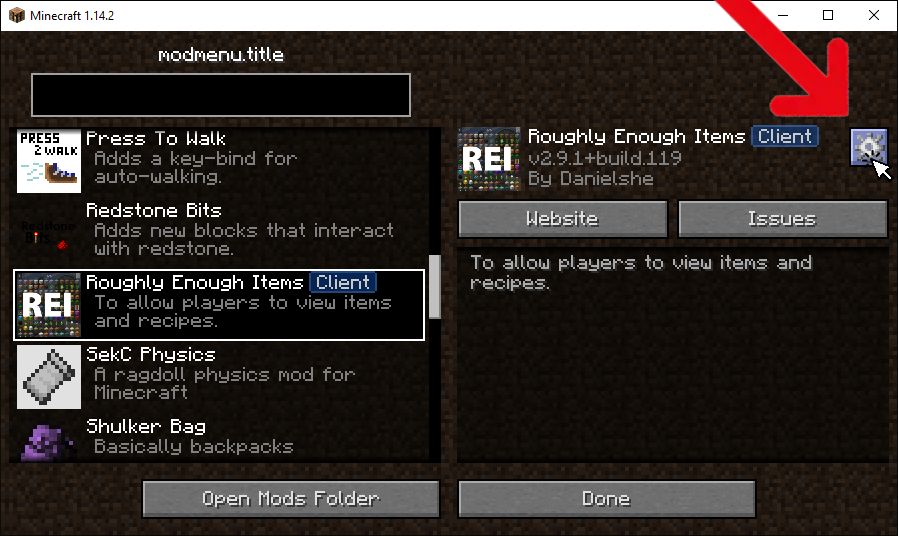
To be able to see the list of mods installed and change mod settings, you may want to install the mod Mod Menu (Fabric). Mod Menu adds a button to the Minecraft main screen:
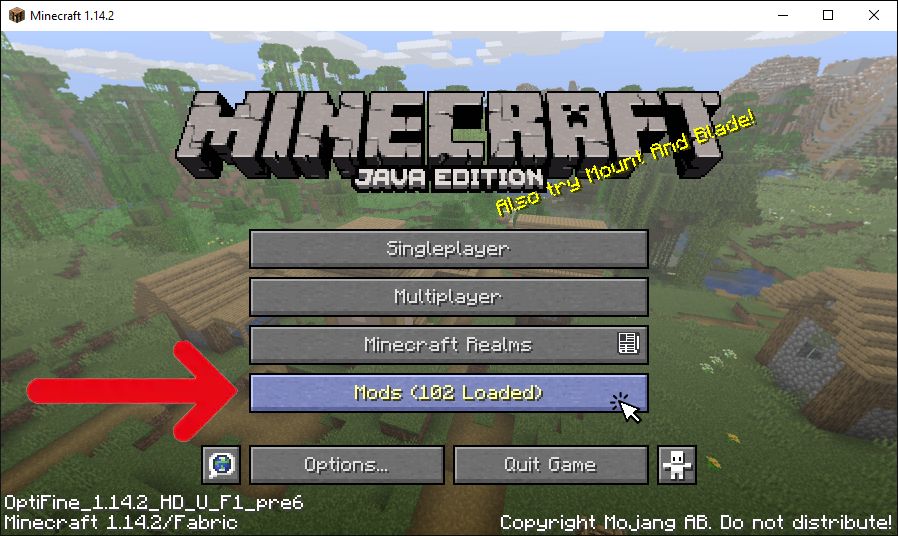
Clicking the button opens a list of installed fabric mods. Mod settings can be changed by clicking the gear button located on the top right:
To install Mod Menu, go to https://www.curseforge.com/minecraft/mc-mods/modmenu and click on “files” and download the correct version for the Minecraft MultiMC instance you just created, save the file in the “Installation” mods folder.
Now check out Fabric mods here. Download the mods to the instance mods folder. Again, check for MC versions in the actual file names, do not rely solely on the “Game Version” column. Usually older version mods will work fine in newer versions of MC/Fabric, for example 1.14 and 1.14.1 mods may work fine in 1.14.2 MC/Fabric, so feel free to test them out.
Also be aware that some mods depend on other mods to work. When downloading a mod file, click on the file name, go to the bottom of the page and check out if there is a “Related Projects” entry with dependencies listed. You will have to download the mods listed as required dependencies and may also download the mods listed as optional dependencies.