
Table of Contents
Publishing your mod on Modrinth using Minotaur
Minotaur is a Gradle plugin similar to CurseGradle. This page only goes through the basics of Minotaur, and you should check out its GitHub documentation for further information.
Basic Implementation
First of all, add the Minotaur plugin to your plugins list in your build.gradle file as so:
plugins {
    id "com.modrinth.minotaur" version "2.+"
}
Minotaur registers a modrinth task for you. Configuration is done through the modrinth {…} block.
Here is a basic example.
import com.modrinth.minotaur.dependencies.ModDependency

modrinth {
    token = 'mySecretToken' // Please use an environment variable for this! The default is `$MODRINTH_TOKEN`.
    projectId = 'AABBCCDD' // The ID of your Modrinth project. Slugs will not work.
    versionNumber = '1.0.0' // The (preferably SemVer) version of the mod. If not specified, it'll use the `version` declaration
    versionName = 'My awesome release' // The version title. If not specified, it'll use the version number
    uploadFile = remapJar // Tells Minotaur to use the remapped jar
    gameVersions = ['1.18', '1.18.1', '1.18.2'] // An array of game versions the version supports
    loaders = ['fabric'] // Self-explanatory.
    dependencies = [
            new ModDependency('P7dR8mSH', 'required') // Creates a new required dependency on Fabric API
    ]
}
Get your Modrinth token from here. You can use this token to access the Modrinth API alongside Minotaur.
Now, when you run gradle modrinth, you should see that your mod has been compiled and uploaded to Modrinth, like so:
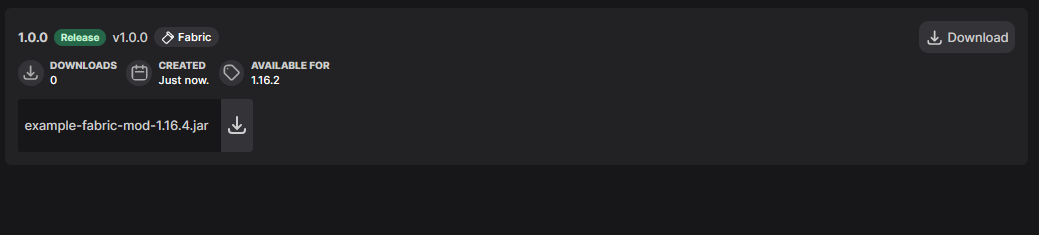
However, this can be limiting and sometimes repetitive to upload, as you would need to edit the values every time you want to release a version.
This is where Java stout and stin come in.
Dynamic Implementation
So, you have a basic implementation. Let's make it dynamic, allowing you to input values through the command line when the task is ran. Typically this is not done for Gradle tasks, and an environment variable or similar static source can be used for these values, but the tutorial is kept for posterity:
First of all, we would need to create a BufferedReader. Why a BufferedReader instead of System.out.readLine()? System.out.readLine() only works on command terminals, and doesn't work on normal IDE terminals such as Eclipse, IntelliJ Idea and Visual Studio Code. Since Gradle tasks are most commonly ran in the IDE, it would be better to use BufferedReader as it supports in-IDE terminals.
Add a new BufferedReader collecting a buffer from System.in to the top of your Modrinth task.
BufferedReader br = new BufferedReader(new InputStreamReader(System.in));
Now you can collect user input by simply calling the method: br.readLine().
Let's add this to our task, shall we? We'll also add some more data, such as a Markdown changelog and make the version name different from the semantic versioning number.
modrinth {
    BufferedReader br = new BufferedReader(new InputStreamReader(System.in));
    System.out.println("Enter a Modrinth token: ");
    token = br.readLine(); // Enter the token you got from the basics part of this tutorial.
    projectId = "" // Enter your Modrinth project ID here.
    System.out.println("Enter the version number:");
    versionNumber = br.readLine();
    System.out.println("Enter the version name:");
    versionName = br.readLine();
    uploadFile = remapJar
    System.out.println("Enter the game version number: (See minotaur docs for valids)");
    gameVersions = [br.readLine()];
    System.out.println("Enter changelog:");
    changelog = br.readLine();
    loaders = ["fabric"]
}
Now, when gradle modrinth is ran, it asks you for some sweet user input. Hell, you could even go as far as using Swing or JavaFX to make a GUI!
Minotaur is great alongside CurseGradle. You can merge both of the tasks together. Creating a new task to run both Minotaur and CurseGradle publishing tasks in one:
task publishToModSites {
    publishToModSites.dependsOn modrinth
    publishToModSites.dependsOn curseforge
}
Updating from Minotaur 1.x to 2.x
Minotaur 2.x introduced a few breaking changes to how your buildscript is formatted.
First, instead of registering your own publishModrinth task, Minotaur now automatically creates a modrinth task. As such, you can replace the task publishModrinth(type: TaskModrinthUpload) { line with just modrinth {.
To declare supported Minecraft versions and mod loaders, the gameVersions and loaders arrays must now be used. The syntax for these are pretty self-explanatory.
Instead of using releaseType, you must now use versionType. This was actually changed in v1.2.0, but very few buildscripts have moved on from v1.1.0.
Finally, dependencies are also an array which take ModDependency and/or VersionDependency (might need to be imported from com.modrinth.minotaur.dependencies package). The first parameter is the project or version ID as a string, and the second parameter is the dependency type: one of required, optional, or unsupported.