Table of Contents
Item Groups
This is the 1.20+ version of this tutorial. For the 1.19 version, see Creating an itemgroup (1.19).
So far, you have used /give @s tutorial:custom_item to obtain your item. However, unlike most vanilla items, it exists in none of the item group, and you cannot easily obtain it in Creative Mode! There are two ways of achieving this:
- adding your item into an existing item group
- create your own item group and add items
All items added to any group will also be searchable within the creative inventory.
Add items into existing item groups
First, choose the item group that the item should be added to. For this example, that item group will be the building blocks group. The registry keys of vanilla item groups are stored in the ItemGroups class.
Next, you will have to create an event handler for modifying item groups.
The modification event also allows more fine-grained control such as placing your custom item in a specific location(eg. after of OAK_DOOR) or other advanced modification, you can register the event handler for each item group that you would like to modify in your onInitialize method. Each item group that you would like to modify requires its own event handler, but the same event handler can be used to add multiple items to one item group.
Items can be positioned relative to the existing vanilla items. Think carefully about where your mod's users would expect the item to be. For example, if you are adding a new type of wood, placing your item after the existing types of wood would make the most sense.
For example, this event handler will place your mod's item after the oak door in the building blocks item group:
In practice, considering items you register may be in large quantities, it's recommended to place then in a particular method, instead of directly in your ModInitializer. See the following example (if write like this, remember to undo the codes above):
Then, remember to refer to that method in your
ModInitializer:
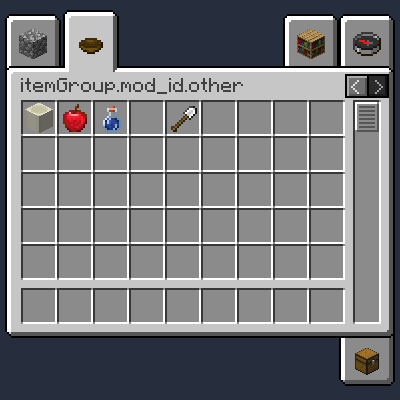
Create your own item group
Before you create an item group, determine whether it would have enough content to warrant its own group. Your item group will be placed on a separate page of tabs, impacting its discoverability, and users may be confused if the item is not where similar items are in the creative inventory.
If you think that your own item group is needed, you can use the FabricItemGroup.builder method to create a builder for an item group. Make sure to call the build method as well:
You can add entries to your item group within the entries callback method. Note that unlike vanilla item groups, where you can add items relative to existing items, you must add items to your own item group in order since there are no vanilla items to position your items relative to.
It is important to set the display name, otherwise it will cause a crash.
The next step is to register your item group.
Of course, you can directly register them when assigning the fields:
Remember to statically load the class in your ModInitializer:
 The screenshot below is outdated.