
This is an old revision of the document!
Table of Contents
创建一个容器方块
这篇教程会创建一个类似分解器的方块,用于解释如何使用FabricAPI中的 ScreenHandler 构建用户交互和解释原版Minecraft是如何运作的
让我们先做一些词汇练习:
Screenhandler:
ScreenHandler 是负责在客户端和服务器之间同步库存内容的类。它也可以同步额外的数值,比如熔炉烧炼进度,这将在下一个教程中展示。
我们的子类会有以下两个构造器: 一个将在服务器端使用,并将储存真正的 Inventory,另外一个将会在客户端运行,用于储存 ItemStack 并且让他们能和服务端同步。
Screen:
Screen 类仅存在于客户端上,他将为你的 ScreenHandler 呈现背景和其他装饰。
方块和方块实体类
首先我们需要创建 Block 和他对应的 BlockEntity 类
- BoxBlock.java
- public class BoxBlock extends BlockWithEntity {
- protected BoxBlock(Settings settings) {
- super(settings);
- }
- @Override
- public BlockEntity createBlockEntity(BlockPos pos, BlockState state) {
- return new BoxBlockEntity(pos, state);
- }
- @Override
- public BlockRenderType getRenderType(BlockState state) {
- // 通过从 BlockWithEntity 继承而来的值是默认为 INVISIBLE 的,所以我们需要改变它让他能为我们所用!
- return BlockRenderType.MODEL;
- }
- @Override
- public ActionResult onUse(BlockState state, World world, BlockPos pos, PlayerEntity player, Hand hand, BlockHitResult hit) {
- if (!world.isClient) {
- // 这里会调用 BlockWithEntity 的 createScreenHandlerFactory 方法, 他会转换为
- // 一个 namedScreenHandlerFactory。 如果你的方块没有继承 BlockWithEntity,那就需要单独实现 createScreenHandlerFactory.
- NamedScreenHandlerFactory screenHandlerFactory = state.createScreenHandlerFactory(world, pos);
- if (screenHandlerFactory != null) {
- //With this call the server will request the client to open the appropriate Screenhandler
- player.openHandledScreen(screenHandlerFactory);
- }
- }
- return ActionResult.SUCCESS;
- }
- // 这个方法能让你储存在他里面的物品在被破坏时洒落一地!
- @Override
- public void onStateReplaced(BlockState state, World world, BlockPos pos, BlockState newState, boolean moved) {
- if (state.getBlock() != newState.getBlock()) {
- BlockEntity blockEntity = world.getBlockEntity(pos);
- if (blockEntity instanceof BoxBlockEntity) {
- ItemScatterer.spawn(world, pos, (BoxBlockEntity)blockEntity);
- // 更新比较器
- world.updateComparators(pos,this);
- }
- super.onStateReplaced(state, world, pos, newState, moved);
- }
- }
- @Override
- public boolean hasComparatorOutput(BlockState state) {
- return true;
- }
- @Override
- public int getComparatorOutput(BlockState state, World world, BlockPos pos) {
- return ScreenHandler.calculateComparatorOutput(world.getBlockEntity(pos));
- }
- }
我们接下里要创建 BlockEntity, 他会使用 Inventory Tutorial 中提到的ImplementedInventory接口.
- BoxBlockEntity.java
- public class BoxBlockEntity extends BlockEntity implements NamedScreenHandlerFactory, ImplementedInventory {
- private final DefaultedList<ItemStack> inventory = DefaultedList.ofSize(9, ItemStack.EMPTY);
- public BoxBlockEntity(BlockPos pos, BlockState state) {
- super(ExampleMod.BOX_BLOCK_ENTITY, pos, state);
- }
- // 从 ImplementedInventory 接口
- @Override
- public DefaultedList<ItemStack> getItems() {
- return inventory;
- }
- //These Methods are from the NamedScreenHandlerFactory Interface
- //createMenu creates the ScreenHandler itself
- //getDisplayName will Provide its name which is normally shown at the top
- @Override
- public ScreenHandler createMenu(int syncId, PlayerInventory playerInventory, PlayerEntity player) {
- //We provide *this* to the screenHandler as our class Implements Inventory
- //Only the Server has the Inventory at the start, this will be synced to the client in the ScreenHandler
- return new BoxScreenHandler(syncId, playerInventory, this);
- }
- @Override
- public Text getDisplayName() {
- return new TranslatableText(getCachedState().getBlock().getTranslationKey());
- }
- @Override
- public void readNbt(NbtCompound nbt) {
- super.readNbt(nbt);
- Inventories.readNbt(nbt, this.inventory);
- }
- @Override
- public NbtCompound writeNbt(NbtCompound nbt) {
- super.writeNbt(nbt);
- Inventories.writeNbt(nbt, this.inventory);
- return nbt;
- }
- }
Registering Block, BlockItem and BlockEntity
- ExampleMod.java
- public class ExampleMod implements ModInitializer {
- public static final Block BOX_BLOCK;
- public static final BlockItem BOX_BLOCK_ITEM;
- public static final BlockEntityType<BoxBlockEntity> BOX_BLOCK_ENTITY;
- // a public identifier for multiple parts of our bigger chest
- public static final Identifier BOX = new Identifier(MOD_ID, "box_block");
- static {
- //The parameter of build at the very end is always null, do not worry about it
- // pre-1.17
- // In 1.17 use FabricBlockEntityTypeBuilder instead of BlockEntityType.Builder
- }
- @Override
- public void onInitialize() {
- }
- }
ScreenHandler and Screen
As explained earlier, we need both a ScreenHandler and a HandledScreen to display and sync the GUI. ScreenHandler classes are used to synchronize GUI state between the server and the client. HandledScreen classes are fully client-sided and are responsible for drawing GUI elements.
- BoxScreenHandler.java
- public class BoxScreenHandler extends ScreenHandler {
- private final Inventory inventory;
- //This constructor gets called on the client when the server wants it to open the screenHandler,
- //The client will call the other constructor with an empty Inventory and the screenHandler will automatically
- //sync this empty inventory with the inventory on the server.
- public BoxScreenHandler(int syncId, PlayerInventory playerInventory) {
- this(syncId, playerInventory, new SimpleInventory(9));
- }
- //This constructor gets called from the BlockEntity on the server without calling the other constructor first, the server knows the inventory of the container
- //and can therefore directly provide it as an argument. This inventory will then be synced to the client.
- public BoxScreenHandler(int syncId, PlayerInventory playerInventory, Inventory inventory) {
- super(ExampleMod.BOX_SCREEN_HANDLER, syncId);
- checkSize(inventory, 9);
- this.inventory = inventory;
- //some inventories do custom logic when a player opens it.
- inventory.onOpen(playerInventory.player);
- //This will place the slot in the correct locations for a 3x3 Grid. The slots exist on both server and client!
- //This will not render the background of the slots however, this is the Screens job
- int m;
- int l;
- //Our inventory
- for (m = 0; m < 3; ++m) {
- for (l = 0; l < 3; ++l) {
- this.addSlot(new Slot(inventory, l + m * 3, 62 + l * 18, 17 + m * 18));
- }
- }
- //The player inventory
- for (m = 0; m < 3; ++m) {
- for (l = 0; l < 9; ++l) {
- this.addSlot(new Slot(playerInventory, l + m * 9 + 9, 8 + l * 18, 84 + m * 18));
- }
- }
- //The player Hotbar
- for (m = 0; m < 9; ++m) {
- this.addSlot(new Slot(playerInventory, m, 8 + m * 18, 142));
- }
- }
- @Override
- public boolean canUse(PlayerEntity player) {
- return this.inventory.canPlayerUse(player);
- }
- // Shift + Player Inv Slot
- @Override
- public ItemStack transferSlot(PlayerEntity player, int invSlot) {
- ItemStack newStack = ItemStack.EMPTY;
- Slot slot = this.slots.get(invSlot);
- if (slot != null && slot.hasStack()) {
- ItemStack originalStack = slot.getStack();
- newStack = originalStack.copy();
- if (invSlot < this.inventory.size()) {
- if (!this.insertItem(originalStack, this.inventory.size(), this.slots.size(), true)) {
- return ItemStack.EMPTY;
- }
- } else if (!this.insertItem(originalStack, 0, this.inventory.size(), false)) {
- return ItemStack.EMPTY;
- }
- if (originalStack.isEmpty()) {
- slot.setStack(ItemStack.EMPTY);
- } else {
- slot.markDirty();
- }
- }
- return newStack;
- }
- }
- BoxScreen.java
- public class BoxScreen extends HandledScreen<ScreenHandler> {
- //A path to the gui texture. In this example we use the texture from the dispenser
- private static final Identifier TEXTURE = new Identifier("minecraft", "textures/gui/container/dispenser.png");
- public BoxScreen(ScreenHandler handler, PlayerInventory inventory, Text title) {
- super(handler, inventory, title);
- }
- @Override
- protected void drawBackground(MatrixStack matrices, float delta, int mouseX, int mouseY) {
- RenderSystem.setShader(GameRenderer::getPositionTexShader);
- RenderSystem.setShaderColor(1.0F, 1.0F, 1.0F, 1.0F);
- RenderSystem.setShaderTexture(0, TEXTURE);
- int x = (width - backgroundWidth) / 2;
- int y = (height - backgroundHeight) / 2;
- drawTexture(matrices, x, y, 0, 0, backgroundWidth, backgroundHeight);
- }
- @Override
- public void render(MatrixStack matrices, int mouseX, int mouseY, float delta) {
- renderBackground(matrices);
- super.render(matrices, mouseX, mouseY, delta);
- drawMouseoverTooltip(matrices, mouseX, mouseY);
- }
- @Override
- protected void init() {
- super.init();
- // Center the title
- titleX = (backgroundWidth - textRenderer.getWidth(title)) / 2;
- }
- }
Registering our Screen and ScreenHandler
As screens are a client-only concept, we can only register them on the client.
- ExampleModClient.java
- public class ExampleClientMod implements ClientModInitializer {
- @Override
- public void onInitializeClient() {
- ScreenRegistry.register(ExampleMod.BOX_SCREEN_HANDLER, BoxScreen::new);
- }
- }
Don't forget to register this entrypoint in fabric.mod.json if you haven't done it yet:
/* ... */
  "entrypoints": {
    /* ... */
    "client": [
      "tutorial.path.to.ExampleModClient"
    ]
  },
ScreenHandlers exist both on the client and on the server and therefore have to be registered on both.
- ExampleMod.java
- public class ExampleMod implements ModInitializer {
- [...]
- public static final ScreenHandlerType<BoxScreenHandler> BOX_SCREEN_HANDLER;
- [...]
- static {
- [...]
- //We use registerSimple here because our Entity is not an ExtendedScreenHandlerFactory
- //but a NamedScreenHandlerFactory.
- //In a later Tutorial you will see what ExtendedScreenHandlerFactory can do!
- BOX_SCREEN_HANDLER = ScreenHandlerRegistry.registerSimple(BOX, BoxScreenHandler::new);
- }
- @Override
- public void onInitialize() {
- }
- }
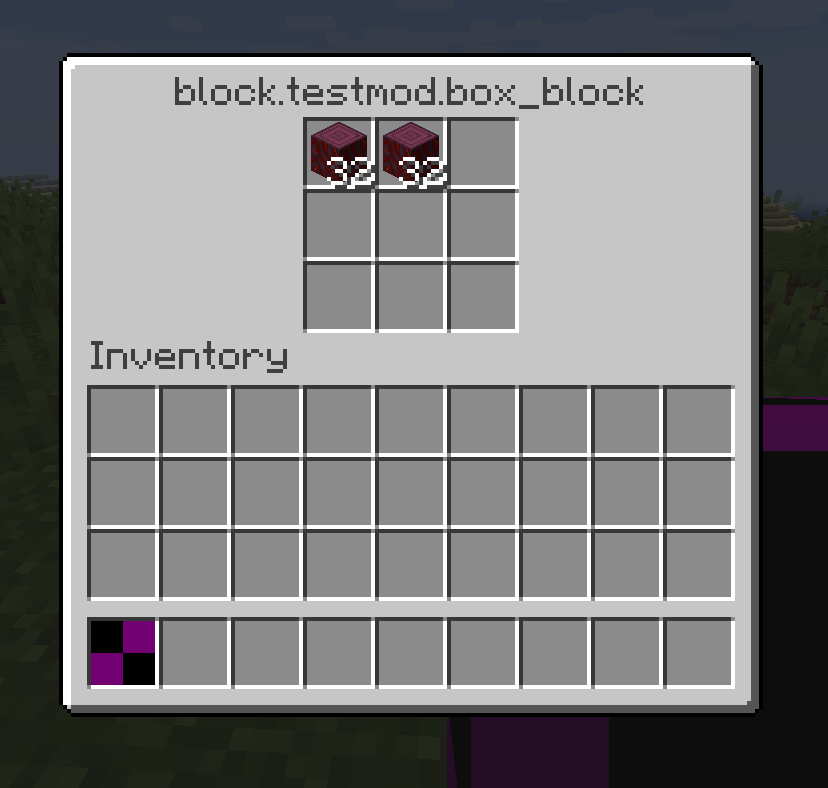
Result
You have now created your own container Block, you could easily change it to contain a smaller or bigger Inventory. Maybe even apply a texture 
Further Reading
- Syncing Custom Data with Extended ScreenHandlers when screen is opened
- Syncing Integers continuously with PropertyDelegates
- An example mod using the ScreenHandler API: ExampleMod on Github.