
This is an old revision of the document!
Table of Contents
Установка сервера Minecraft/Fabric
ШАГ 1: Создание профиля Minecraft/Fabric для одиночной игры
Прежде, чем настраивать сервер Minecraft вместе с Fabric, возможно, вы хотите скачать протестировать все моды в MultiMc, и только когда вы убедились, что нареканий нет, приступать к настройке сервера. Как это сделать, вы можете узнать тут: Установки Fabric с помощью MultiMC
ШАГ 2: Проверка установки Java
Сервер Minecraft для работы требует Java Runtime Environment. Чтобы проверить, установлена ли Java, откройте окно Выполнить, используя комбинацию клавиш Windows+R. Введите cmd в поле для текста и нажмите OK. Это действие откроет командную строку.

Введите команду java -version и на Enter

Проверьте, похожа ли версия Java на что-то подобное:
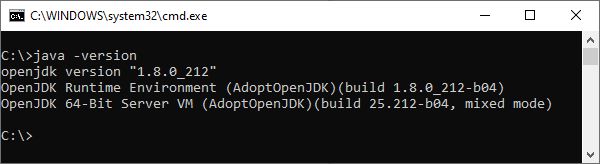
Вы можете пропустить ШАГ 3 если вы не хотите обновлять установленную версию Java.
Однако, если Java не установлена, результат команды будет подобным такому:

ШАГ 3: По усмотрению: Установка Java
Если в ШАГЕ 2 вы поняли, что на вашем компьютере Java не установлена, вам нужно её установить.
Также если версия установленной Java как минимум 8, вы можете пропустить этот шаг.
Чтобы загрузить установщик Java, перейдите сюда
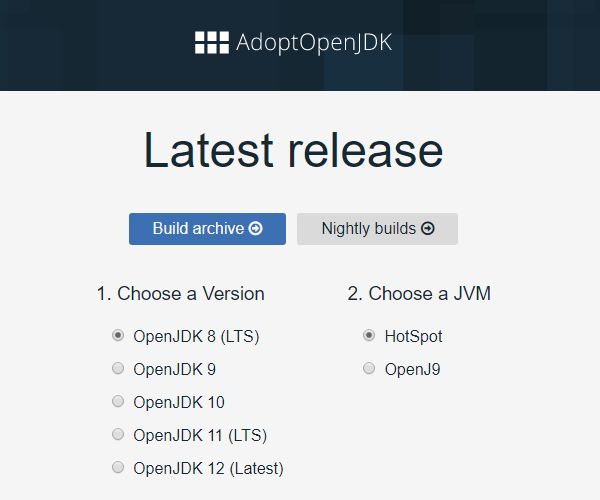
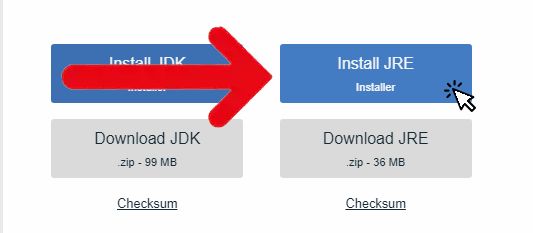
Выберите версию Java 8 (JRE), скачайте установщик для своей операционной системы и следуйте его инструкциям.
ШАГ 4: Установка Fabric в папку сервера
Перейдите на https://fabricmc.net/use/ , и выберите пункт “Server”, затем скачайте установщик для Windows (exe) или универсальный (jar).
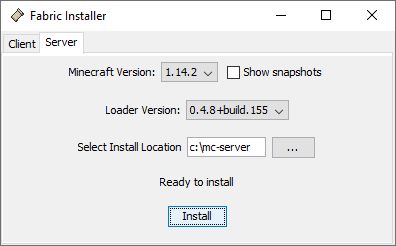
Запустите скачанный установщик Fabric в виде jar/exe файла. Выберите вкладку Server. Выберите Minecraft Version и Loader Version.
В поле Select Install Location введите путь папки, в которую хотите выполнить установку. Если заданной вами папки не существует, установщик создаст её.
Нажмите Install
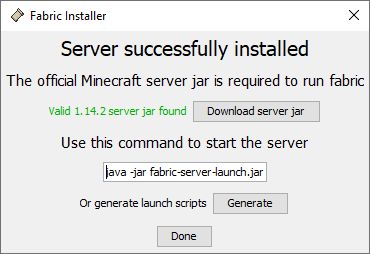
Процесс установки может занять некоторое время, однако, когда он закончится, вы увидите что-то подобное:

Нажмите на Download server jar чтобы скачать оригинальный jar-файл сервера Minecraft
Нажмите на Generate, чтобы сгенерировать start.bat или start.sh Эти файлы вы можете использовать для запуска сервера.
Теперь вы можете закрыть установщик Fabric.
В командной строке, которую вы открыли в ШАГЕ 2 напишите:
cd "c:\mc-server" [ENTER]
Подсказка: Если папка находится в другом системном томе, сначала переключитесь на него, только потом переходите в нужную папку. Чтобы переключиться на другой топ, введите в командной строке:
d: [ENTER]
Поле ввода команды в командной строке должно измениться на следующее:
c:\mc-server>
Теперь напишите следующее, чтобы создать файл eula.txt:
echo eula=true>eula.txt [ENTER]
ШАГ 5: Запуск сервера
NOTE: The installer now has a button to generate the batch files for you, so the following instructions may be outdated.
NOTE: If you are upgrading Fabric in this server, delete the .fabric folder inside the server folder if it exists. If you are also upgrading the Minecraft version, remember to download the correct server.jar as explained before.
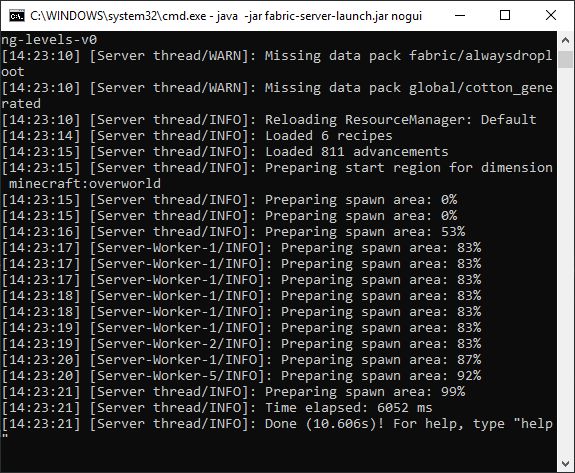
Start the server by typing in the command window:
java -jar fabric-server-launch.jar nogui [ENTER]
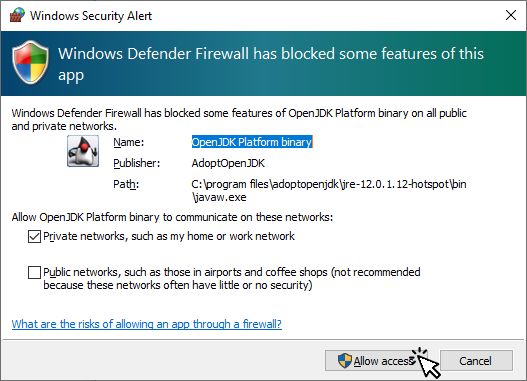
If you are using Windows and get a Windows Security Alert, click on Allow access
You should see something like this in the command window:
Now that the server is up and running, you can stop it and create/edit a batch file that starts the server. Type
stop [ENTER]
in the command window to stop the server. Then type the following:
echo java -jar fabric-server-launch.jar nogui>start.bat [ENTER]
If you want to specify how much RAM to allocate to the server, type this instead of line above:
echo java -Xms1024m -Xmx2048m -jar fabric-server-launch.jar nogui>start.bat [ENTER]
Use the values you want for Xms and Xmx
Now type this:
echo pause»start.cmd [ENTER] (that's two “>”, not “»”)
This will create a c:\mc-server\start.bat file that you can use to start the server by double clicking it.
Now you can add mods to the c:\mc-server\mods folder. The easiest way to do this is to copy the mods you have in the MultiMC instance you created to test the mods to include in the server.
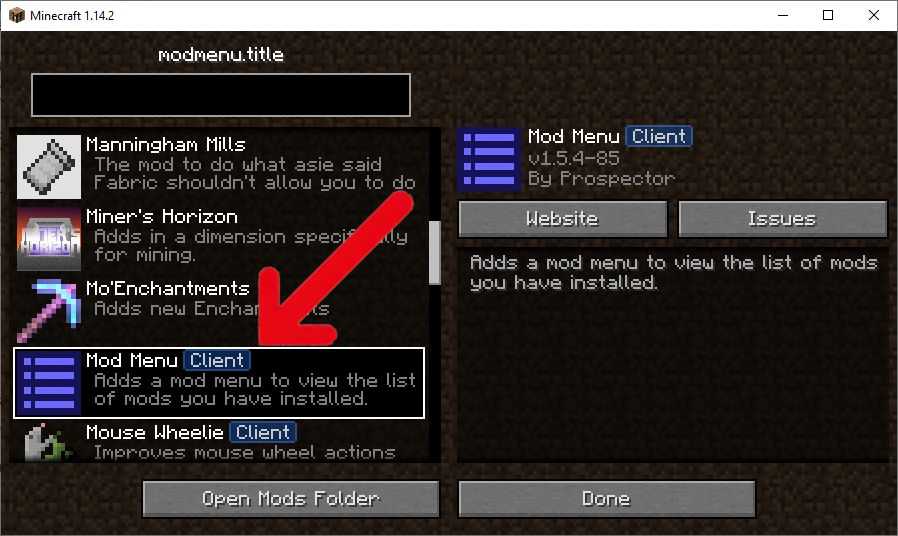
You may want to review the mod list in the MultiMC instance by opening the Mod Menu GUI. Any mod labeled as CLIENT you can exclude from the server mods folder.
If you are using Optifine in the multimc instance, do not copy the optifine and optifabric jar files in the server mods folder.
After copying the mod files to the server mods folder, you may also want to copy the MultiMC instance config folder files to the server config folder.
Now restart the server by double clicking the start.bat file.
NOTES
Some mods that are intended to only be installed in the CLIENT may have bugs and crash the server if you copy those mods to the server mods folder. You will have to determine the mod that is crashing the server by removing mods one by one, or half the mods at a time until you find the mod that is causing the crash. If you encounter this problem, please open an issue in the mod issues page.
If you are going to use a hosted server, and the provider only allows you to use server.jar:
Rename server.jar to vanilla.jar
Rename fabric-server-launch.jar to server.jar
Edit the fabric-server-launcher.properties config file: serverJar=vanilla.jar
This may work if the hosting server only checks for the file name of the jar. If it seems that you are not able to setup a Fabric service on a hosted server, ask the hosting company to add support for Fabric.