Table of Contents
블록 추가하기
블록을 추가하는 방법은 아이템을 추가하는 것과 비슷합니다. 클래스를 생성해서 블록의 인스턴스를 만들고, Registry.BLOCK에 블록을 레지스터 하시면 됩니다. 그리고 블록의 생김새를 위해 블록 택스쳐와 블록 모델을 추가해야 합니다. 블록 모델 구성의 자세한 정보는 마인크레프트 위키 모델 페이지를 참조하세요.
블록 인스턴스 만들기
Block의 인스턴스를 먼저 만듭니다. 이 Block 인스턴스는 어디에나 위치할 수 있습니다. 하지만 우리는 ModInitializer의 맨 위에 위치시킬 것 입니다. Block의 생성자는 블록의 속성을 설정할 수 있는 AbstractBlock.Settings의 인스턴스를 요구로 합니다. 패브릭은 FabricBlockSettings 빌더 클래스에 더 많은 사용 가능한 옵션을 제공합니다.
블록 등록하기
블록은 Registry.BLOCK 저장소에 등록되어야 합니다. Registry.register를 적절한 파라미터에 맞게 실행하세요.
당신의 커스텀 블록은 아이템으로 아직 접근할 수 없을 것입니다. 하지만 게임 내에서는 /setblock tutorial:example_block을 통해 확인할 수 있습니다.
블록 아이템 등록하기
대부분의 경우에는 당신은 아이템을 통해 당신의 블록을 설치하게 하고 싶을 것 입니다. 이 것을 위해 당신은 Registry.ITEM 저장소에 그 블록에 맞는 BlockItem을 등록해야합니다. 저장소에 등록된 블록 아이템의 이름은 주로 블록의 저장소 이름과 같습니다.
블록에게 시각적 요소 부여하기
현재까지는 당신의 블록은 게임 내에서 보라색과 검은색의 체크 무늬로 표시될 것입니다. 마인크래프트는 블록의 에셋을 로딩하는 중 문제가 발생했을 때 이렇게 표시합니다. 이 문제의 전체 내용은 클라이언트를 실행할 때 출력되는 로그에서 확인할 수 있습니다. 당신은 블록에게 시각적 요소를 부여하기 위해 다음의 파일이 필요합니다
- 블록 상태 파일
- 블록 모델 파일
- 텍스쳐
- 만약 블록 아이템이 있을 경우, 아이템 모델 파일
해당 파일들은 다음 위치에 위치되어야 합니다:
블록 상태: src/main/resources/assets/tutorial/blockstates/example_block.json
블록 모델: src/main/resources/assets/tutorial/models/block/example_block.json
아이템 모델: src/main/resources/assets/tutorial/models/item/example_block.json
텍스쳐: src/main/resources/assets/tutorial/textures/block/example_block.png
블록 상태 파일은 블록의 블록 상태(blockstate)에 따라 어떤 블록 모델을 사용할지 결정합니다. 우리의 블록은 상태라고 할 게 딱히 없으니 우리는 블록 상태 파일을 다음과 같이 작성할 수 있을 것입니다.
“”.
- src/main/resources/assets/tutorial/blockstates/example_block.json
{
  "variants": {
    "": { "model": "tutorial:block/example_block" }
  }
}
블록 모델 파일은 당신의 블록의 모양과 텍스쳐를 결정합니다. 우리의 모델은 모든 면에 같은 텍스쳐를 적용하는 block/cube_all을 부모로 삼을 것 입니다. 따라서 블록 모델 파일은 다음과 같이 작성할 수 있습니다.
- src/main/resources/assets/tutorial/models/block/example_block.json
{
  "parent": "block/cube_all",
  "textures": {
    "all": "tutorial:block/example_block"
  }
}
대부분의 경우에는 블록 아이템을 블록과 똑같이 보이길 원할 것입니다. 그렇다면 당신은 블록 모델을 부모로 삼는 아이템 모델을 다음과 같이 작성하면 됩니다.
- src/main/resources/assets/tutorial/models/item/example_block.json
{
  "parent": "tutorial:block/example_block"
}
이제 마인크래프트를 켜고 블록의 시각적인 요소를 확인해보세요!
블록 드랍 설정하기
블록이 부숴졌을 때 아이템이 떨어지게 하고 싶으면, 루트 테이블이 필요로 합니다. 당신의 블록이 부숴졌을 때 아이템을 떨어트리는 루트 테이블을 다음과 같이 작성할 수 있습니다.
- src/main/resources/data/tutorial/loot_tables/blocks/example_block.json
{
  "type": "minecraft:block",
  "pools": [
    {
      "rolls": 1,
      "entries": [
        {
          "type": "minecraft:item",
          "name": "tutorial:example_block"
        }
      ],
      "conditions": [
        {
          "condition": "minecraft:survives_explosion"
        }
      ]
    }
  ]
}
커스텀 블록 클래스 만들기
The above approach works well for simple items but falls short when you want a block with unique mechanics. We'll create a separate class that extends Block to do this. The class needs a constructor that takes in an AbstractBlock.Settings argument:
You can override methods in the block class for custom functionality. Here's an implementation of the onUse method, which is called when you right-click the block. We check if the interaction is occurring on the server, and then send the player a message saying, “Hello, world!”
To use your custom block class, replace new Block with new ExampleBlock:
Custom VoxelShape
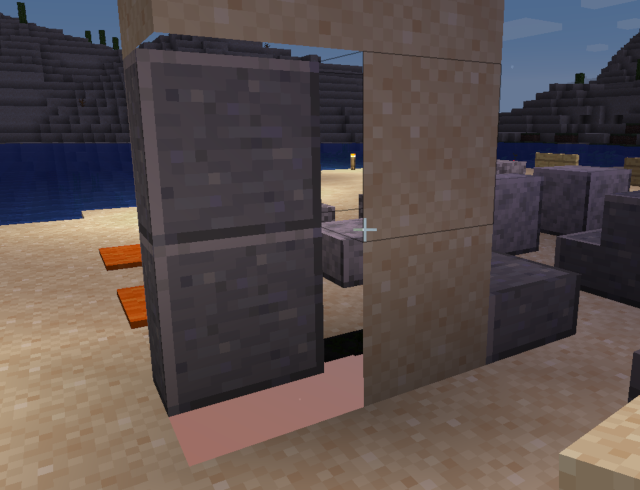
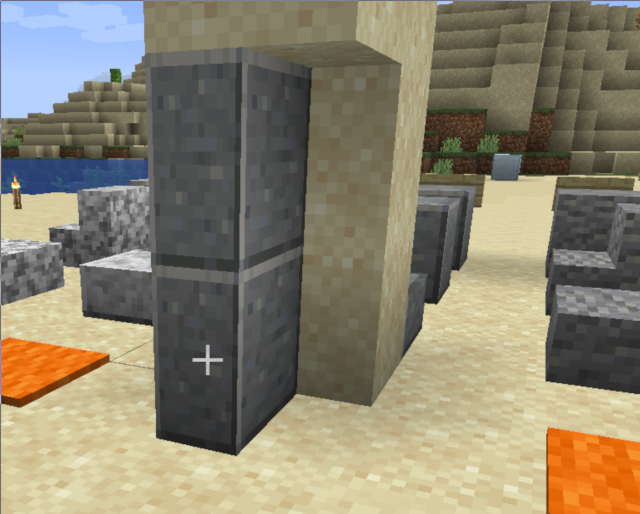
When using block models that do not entirely fill the block (eg. Anvil, Slab, Stairs), adjacent blocks hide their faces:
To fix this, we have to define the VoxelShape of the new block:
 @Override
 public VoxelShape getOutlineShape(BlockState state, BlockView view, BlockPos pos, ShapeContext context) {
     return VoxelShapes.cuboid(0f, 0f, 0f, 1f, 1.0f, 0.5f);
 }
Note that the collision shape of the block defaults to the outline shape if it is not specified.
Next Steps
Adding simple state to a block, like ints and booleans.
Giving blocks a block entity so they can have advanced state like inventories. Also needed for many things like GUI and custom block rendering.


