
This is an old revision of the document!
Table of Contents
Instalar Fabric - Minecraft Launcher (Windows)
Videotutorial

PASO 1: Descargar el instalador de Fabric
Ve a https://fabricmc.net/use/ y descarga el instalador .exe para windows o usa el instalador universal (necesitas tener Java para esto).

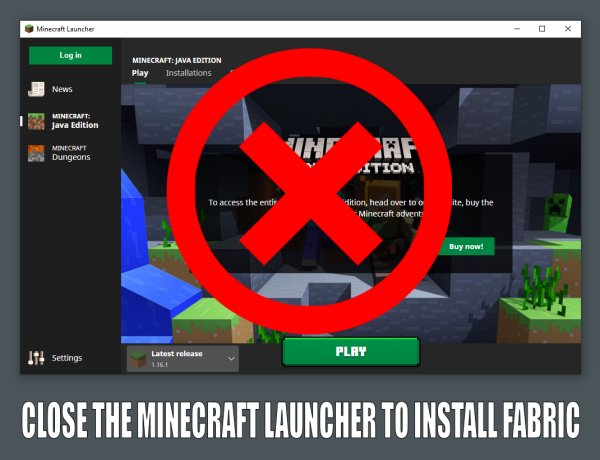
Cierra el Minecraft Launcher! El launcher no debe estar abierto mientras se esta ejecutando el instalador de Fabric.
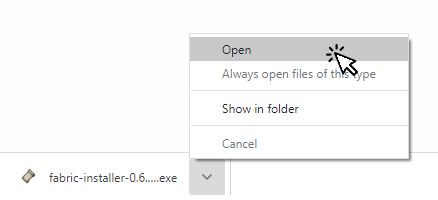
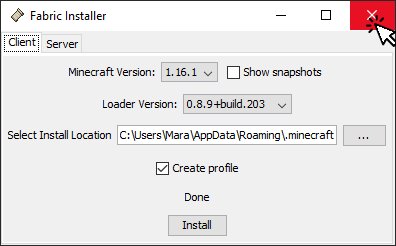
Ejecuta el instalador:
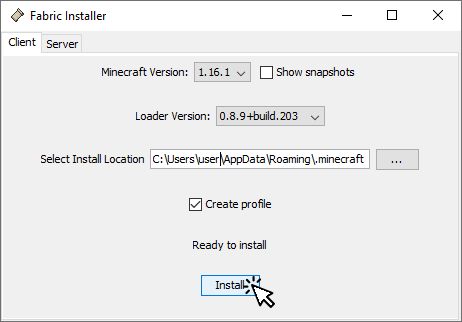
Selecciona la opción de Client. Luego, selecciona la Minecraft Version(Para la versión de Minecraft que quieres instalar Fabric) y Loader Version(Para la versión del Loader de Fabric que deseas instalar). Usualmente, no necesitarás cambiar la versión del Loader, la última versión disponible debería ser más que suficiente.
Si no está por defecto, ajusta la ruta de instalación a la carpeta del Minecraft Launcher presionando Select Install Location.
Si quieres crear un nuevo por perfil en el Minecraft Launcher selecciona Create Profile.
Has clic en Install
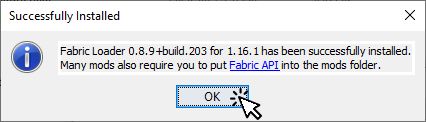
Cierra el cuadro de diálogo “Successfully installed”.
Cierra el instalador de Fabric.
¡NO USES LA INSTANCIA QUE ACABAS DE CREAR!
PASO 2 (OPCIONAL): Editar el "Game Directory" de tu instalación de Fabric
Este paso es opcional. Si no cambias el GAME DIRECTORY la instalacion de Fabric podra compartir los mundos guardando con otras instalaciones que tengan el “game directory” por defecto. It will also share the mods and config folder with other modded Installations you may have that have the game directory set to default, potentially making everything an absolute mess.
You may set the GAME DIRECTORY to any folder you want, but it may be a good idea to use a folder inside your user profile for example:
userprofile\.minecraft-installations\mynewfabricinstallation
Where userprofile is the path of the actual location of your userprofile, usually C:\Users\yourusername
Where yourusername is your actual user name, not the text yourusername, for example James or Anna or MadMax.
You will have to manually create this folder to use as “Game Directory” for the Fabric “Installation” you just created.
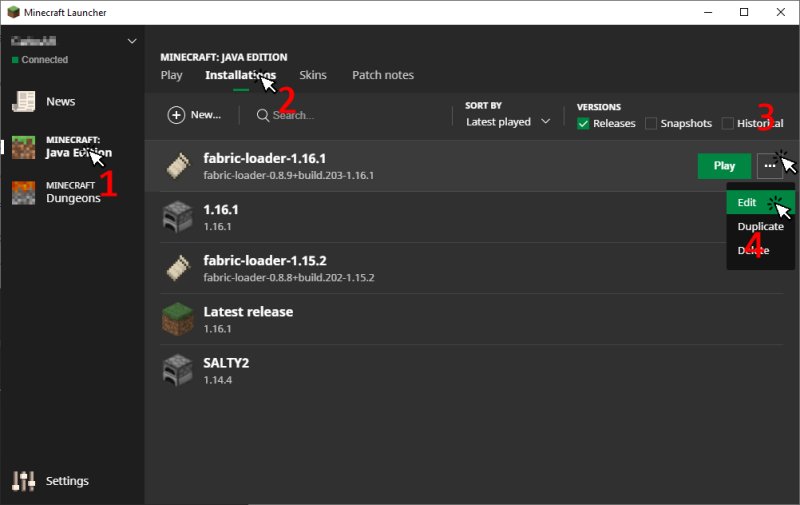
Open the Minecraft launcher, click on Minecraft Java Edition, click on Installations, click on the … button of the Fabric Installation, Click on Edit:
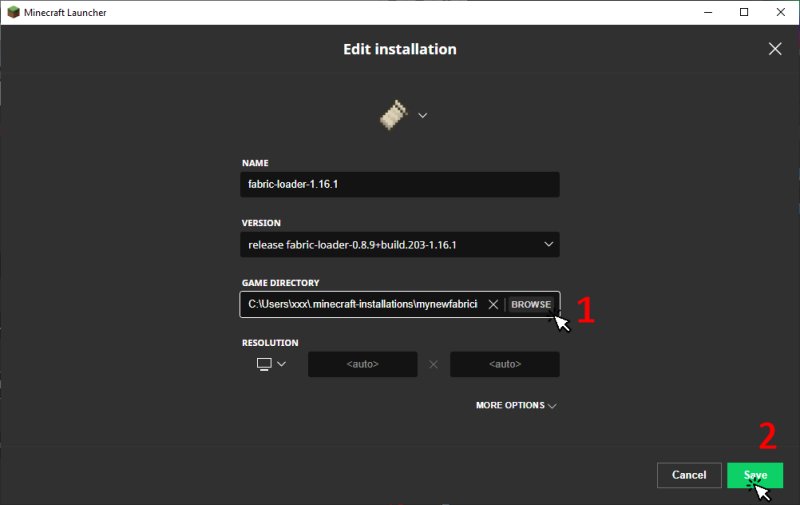
Change the GAME DIRECTORY to point to the folder you created, different from <Use default directory>, click Save
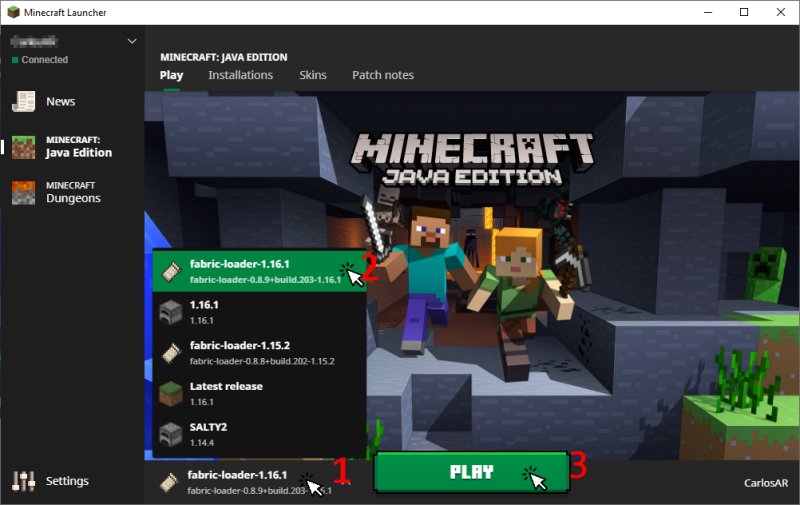
STEP 3: Run the Fabric Installation
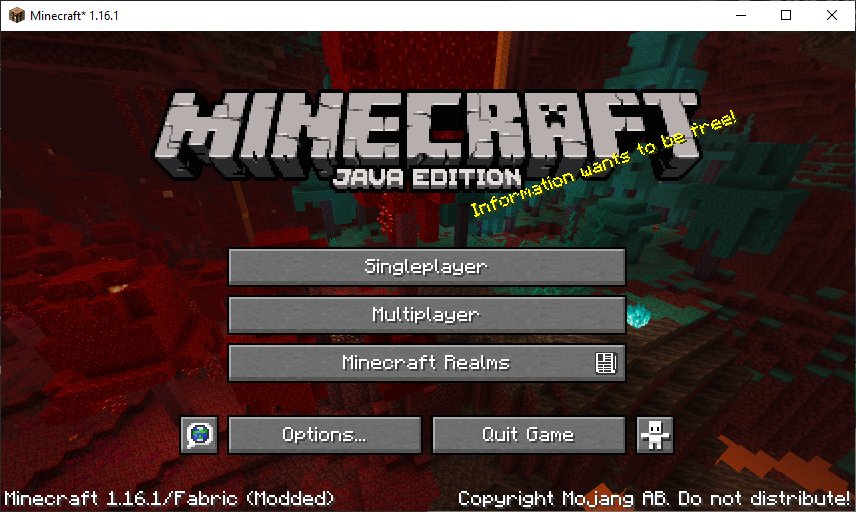
When Minecraft starts, you should see something similar to this:
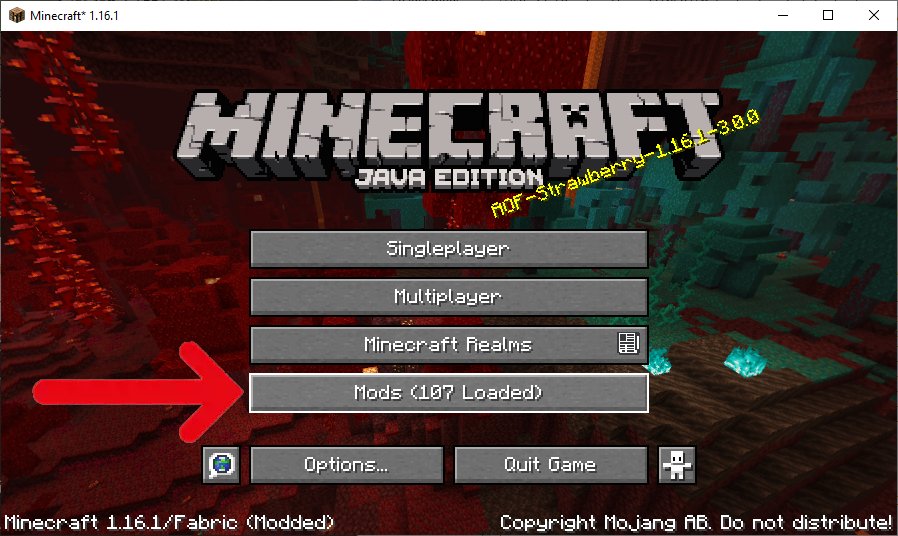
For now, close Minecraft so you can install Fabric mods. Mods must be copied to the mods folder of the Installation folder. If you did not set a custom directory for the Installation, the mods folder will be located in:
FINDING THE MINECRAFT MODS FOLDER:
Windows: Press Win+R and type %appdata%\.minecraft\mods and press Ok
macOS: In Finder, in the Go menu, select “Go to Folder” and enter ~/Library/Application Support/minecraft/mods
Linux: ~/.minecraft/mods or /home/<your username>/.minecraft/mods
If you set a custom folder for the installation, the mods folder will be located in mynewfabricinstallation\mods
Remember where your mods folder is located, from now on that folder will be referred as “the mods folder”
STEP 4: Install the Fabric API
The “Installation” you just created when you installed the Fabric Mod Loader contains no mods, you now may install the Fabric API, since many mods depend on it.
The Fabric API is the core library for the most common hooks and intercompatibility measures utilized by mods using the Fabric toolchain.
If that sounds too complicated just consider the Fabric API as just another mod that will be loaded by the Fabric Loader, and almost all Fabric mods depend on it, so this will be the first mod to install.
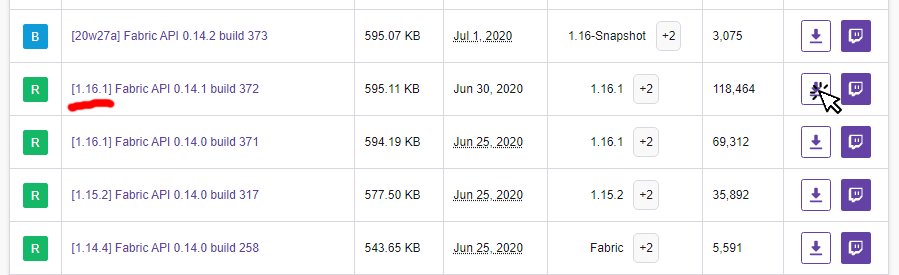
Go to CurseForge or Modrinth and download the latest file for the version of Minecraft you selected when installing Fabric.
Be aware that CurseForge or Modrinth may not have the latest Minecraft versions, so the version indicated in the “Game Version” column may not be the real actual version of the file! Check the file name for the real Minecraft version the file is intended for.
Download the file to the mods folder, or if the file downloads directly to your “Downloads” folder, copy the file to the mods folder.
STEP 5: Install Fabric Mods
To be able to see the list of mods installed and change mod settings, you may want to install the mod Mod Menu (Fabric). Mod Menu adds a button to the Minecraft main screen:
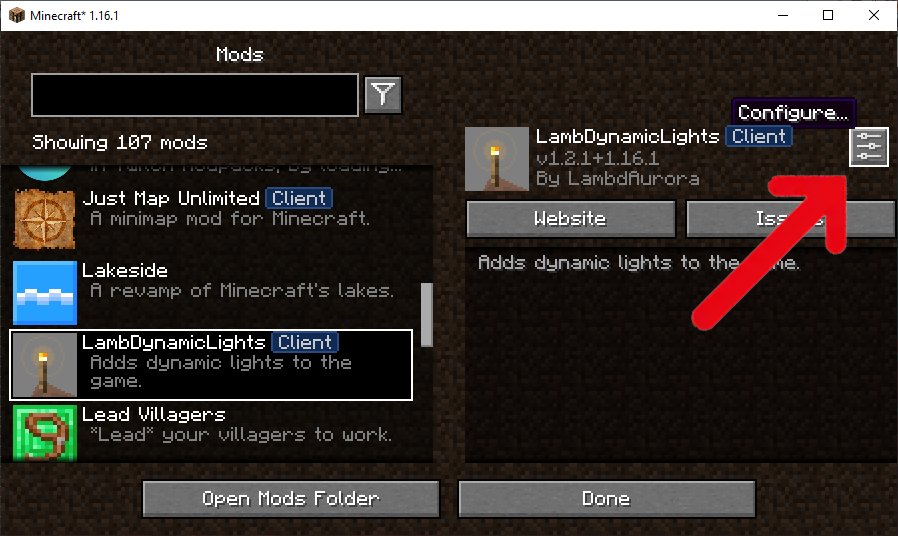
Clicking the button opens a list of installed fabric mods. Mod settings can be changed by clicking the gear button located on the top right:
To install Mod Menu, go to its Modrinth page, and click on “files”, or “versions” and download the correct version for the Minecraft version you installed, download/copy the file to the mods folder.
You can now browse for Fabric mods on either CurseForge or Modrinth. Remember that you can filter by modloader and game version on both websites. Download/copy the mods to the mods folder. Again, check for MC versions in the actual file names, do not rely solely on the “Game Version” column. Usually older version mods will work fine in newer versions of MC/Fabric, for example 1.14 and 1.14.1 mods may work fine in 1.14.2 MC/Fabric, so feel free to test them out. This is no longer the case with 1.19.x and above, however.
Also be aware that some mods depend on other mods to work. When downloading a mod file, click on the file name, go to the bottom of the page and check out if there is a “Related Projects” entry with dependencies listed. You will have to download the mods listed as required dependencies and may also download the mods listed as optional dependencies. Some mods may state what dependencies are required in the description, so make sure to read it.