This is an old revision of the document!
Table of Contents
Adding an Item
Introduction
One of the first things you'll want to do with Fabric is adding a new item.
You're going to need to create an Item object, register it, and give it a texture. To add additional behavior to the item you will need an Item class.
Registering an Item
Just like most additions you make in Fabric, you'll need to register items to the item Registry. You can call the registry with Registry.register. The first argument is the registry type, such as Registry.ITEM or Registry.BLOCK. The second argument is the name of your addition– remember to append it with your namespace! In most cases, the last argument is an instance of what you are registering.
First, we'll create an instance of our item. We'll store it at the top of our initializer class, but it can be stored in any other class. The constructor will require an Item.Settings object. This is used to set properties such as the creative inventory category, durability, and stack count. In our Item.Settings we're just going to tell our item to go in the Misc category. It's useful to keep an instance so you can reference and access it later from different classes:
public class ExampleMod implements ModInitializer
{
    // an instance of our new item
    public static final Item FABRIC_ITEM = new Item(new Item.Settings().itemGroup(ItemGroup.MISC));
    [...]
}
Second, register your item in your onInitialize method. You can also register your item in any other class, as long as it's called during initialization.
public class ExampleMod implements ModInitializer
{
    // an instance of our new item
    public static final Item FABRIC_ITEM = new Item(new Item.Settings().itemGroup(ItemGroup.MISC));

    @Override
    public void onInitialize()
    {
        Registry.register(Registry.ITEM, new Identifier("my_mod", "fabric_item"), FABRIC_ITEM);
    }
}
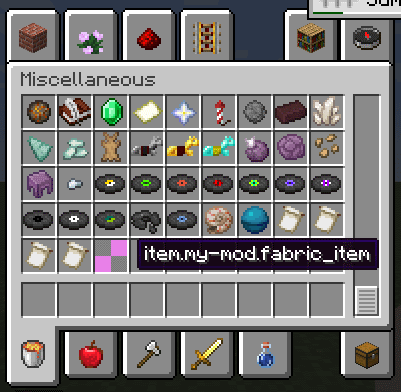
At this point, if you start your Minecraft game, you will see your new item. Pretty easy!
Adding Item textures
You're probably annoyed with the black & purple missing texture, so we'll fix that now.
Registering a texture for an item requires an item model .json file and a texture image. You're going to need to add these to your resource directory; the direct path of each is:
  Item model: .../resources/assets/my_mod/models/item/fabric_item.json
  Item texture: .../resources/assets/my_mod/textures/item/fabric_item.png
Note that my_mod is your modid. Our example texture can be found here.
If you registered your item properly in the first step, your game will also complain about a missing texture file in a fashion similar to this:
[Server-Worker-1/WARN]: Unable to load model: 'my_mod:fabric_item#inventory' referenced from: my_mod:fabric_item#inventory: java.io.FileNotFoundException: my_mod:models/item/fabric_item.json
It conveniently tells you exactly where to put your item model file, so this is good for when you can't figure it out yourself.
As for the actual contents of your item json file, a basic template is as follows:
{
  "parent": "item/generated",
  "textures": {
    "layer0": "my_mod:item/fabric_item"
  }
}
The parent of your item changes how it's rendered in the hand and comes in useful for things like block items in the inventory. textures/layer0 is the location of your image file.
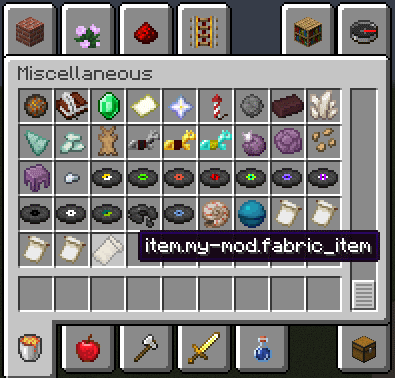
If you set everything up correctly, you should be met with a textured item:
Creating an Item class
To add additonal behavior to the item you will need an Item class. We'll name our Item class 'FabricItem'. Create a constructor taking an Item.Settings object; your class should now look like this:
public class FabricItem extends Item
{
    public FabricItem(Settings settings)
    {
        super(settings);
    }
}
We'll make it to play a sound on use by overriding Item's use method.
public class FabricItem extends Item
{
    public FabricItem(Settings settings)
    {
        super(settings);
    }

    @Override
    public TypedActionResult<ItemStack> use(World world, PlayerEntity playerEntity, Hand hand)
    {
        playerEntity.playSound(SoundEvents.BLOCK_WOOL_BREAK, 1.0F, 1.0F);
        return new TypedActionResult<>(ActionResult.SUCCESS, playerEntity.getStackInHand(hand));
    }
}
Finally, in our mod initializer, we'll replace our Item instance with a FabricItem.
public class ExampleMod implements ModInitializer
{
    // an instance of our new item
    public static final FabricItem FABRIC_ITEM = new FabricItem(new Item.Settings().itemGroup(ItemGroup.MISC));
    [...]
}
If you did everything correctly, using the item should now play a sound.


