This is an old revision of the document!
Table of Contents
Installing Fabric
Client (MultiMC; recommended)
First, open the download page and choose the game, mapping and loader versions.
- Generally, choosing the latest mapping version for a given game version is advisable, as mods do not depend on the deobfuscated names staying the same.
- The loader should be mostly game version-independent. If this situation changes, it will be pointed out, so don't worry!
Click “copy MultiMC instance url”. This will copy an URL to the MultiMC template .zip to your clipboard.
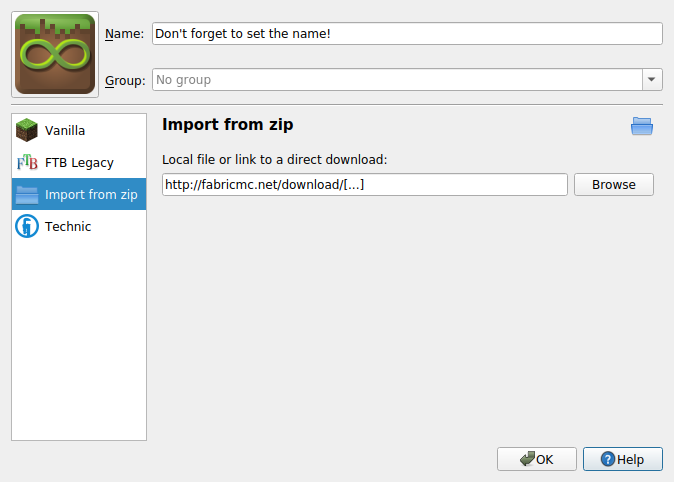
Start MultiMC. Click on “Add Instance” in the top-left, then select “Import from ZIP” and paste the URL in the text field. Don't forget to set an instance name, otherwise it will use the default “multimc”!
Press OK. Your Fabric instance is ready to go - feel free to add mods to it!
Client ("Vanilla" Launcher)
First, download the Fabric installer from the download page.
After opening it, a window will appear. Configure:
- the mapping and loader version (as per advice in the MultiMC section);
- the install location (the default should be fine on most platforms).
Press Install. A new game version and profile will be created in the vanilla launcher's menu, which you can now use to launch Fabric.
Dedicated Server
Up-to-date as of Loader 0.4.4+. Older versions choose different techniques. Installer 0.4.0+ required!
Go to the download page and download the installer.
In the installer:

- select the “Server” tab, at the top,
- choose the desired mappings (→ game) version, plus the desired loader version,
- choose the desired output directory,
- press “Install”.
In the output directory, a “fabric-server-launch.jar” will be created. It expects a “server.jar” next to it, which is the vanilla server .JAR, generally found on Mojang's version announcement blog posts - but will also generate a properties file on first launch where you can change the path.
Adding Mods
To add a mod to your Fabric client, navigate to the mods folder inside your Minecraft directory. If it does not exist, create it now. Download the jar of the mod you want, and drop it into this folder. Most mods will require Fabric API; you can place the jar for the API in /mods as well.
For a list of Fabric mods, you can go to Minecraft CurseForge and set the filter type to Fabric.
Installing from the CLI
The fabric installer has full support from installing the client and the server from the command line. This could be used to automate the installation. The installer has a number of commands that can be used for a headless install.
java -jar fabric-installer-0.4.1.22.jar <command>
If no command is provided the gui version will attempt to run.
help
java -jar fabric-installer-0.4.1.22.jar help
Prints out all of the commands available along with the latest mappings and loader versions.
server
java -jar fabric-installer-0.4.1.22.jar server
Used to create the required files for a fabric server. There are 3 optional arguments that can be passed.
- -dir Used to select the installation dir, defaults to the current working directory
- -mappings Used to select the mappings version, defaults to the latest
- -loader Used to select the loader version, defaults to the latest
client
java -jar fabric-installer-0.4.1.22.jar client -dir “C:\Users\user\AppData\Roaming\.minecraft”
Used to create the required files for a fabric server. There are 3 optional arguments that can be passed.
- -dir Used to select the installation dir, required
- -mappings Used to select the mappings version, defaults to the latest
- -loader Used to select the loader version, defaults to the latest

